


A STATEMENT PIECE FOR EVERY ROOM
Your walls are more than just a backdrop—they're a canvas for your creativity and personal style. Whether you're looking to refresh a single accent wall or redefine an entire space, Minted's collection of wall murals and wall decals offers a stunning selection of designs created by independent artists. From bold, modern patterns to soft, nature-inspired landscapes, our wall stickers allow you to make a big impact with minimal effort. Each wall mural is thoughtfully curated to bring art into your home in a fresh, unexpected way.
ARTISTIC DESIGNS, HANDPICKED FOR YOU
At Minted, we believe that great design should be accessible to everyone. That's why our wall murals feature original artwork from our global community of independent artists. Every design is selected through our unique crowdsourcing process, ensuring that only the most striking and innovative wall decals make it to your walls. By choosing a Minted wall mural, you're not just decorating your space—you're supporting independent creatives and bringing their vision to life in your home.
ELEVATE YOUR DECOR WITH EASE
Redecorating doesn't have to be complicated. Our high-quality wall stickers are printed on durable, repositionable panels that are easy to install and remove, making them perfect for homeowners and renters alike. Whether you're updating a nursery, office, living room, or bedroom, our wall murals provide an effortless way to infuse personality into any space. No glue, no mess—just instant transformation.
ENDLESS DESIGN POSSIBILITIES
With hundreds of unique wall decal designs to choose from, finding a mural that fits your aesthetic is simple. Here are just a few of the styles you can explore:
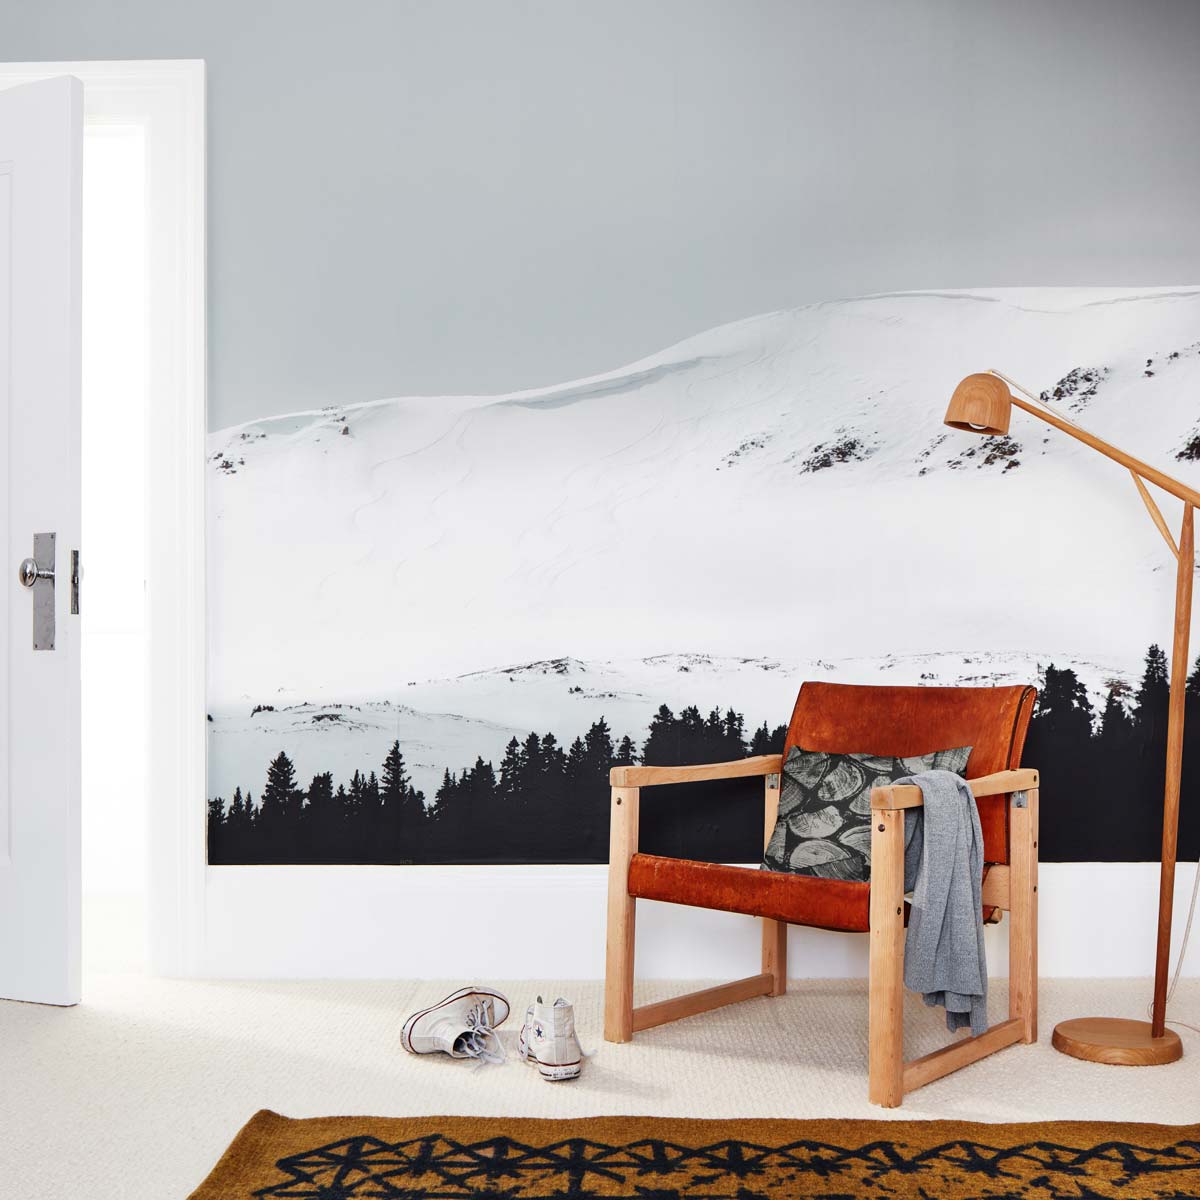
- Botanical & Nature-Inspired – Bring the serenity of the outdoors inside with lush florals, misty mountains, or calming ocean scenes.
- Abstract & Modern – Make a contemporary statement with bold patterns, geometric shapes, and expressive brushstrokes.
- Whimsical & Playful – Perfect for kids' rooms or creative spaces, these wall stickers add a touch of magic and imagination.
- Minimalist & Chic – Clean lines, soft neutrals, and subtle textures make for a refined, understated elegance.
- Vintage & Classic – Timeless designs featuring antique maps, vintage illustrations, and charming retro patterns.
CUSTOMIZE YOUR SPACE, YOUR WAY
Your home should reflect your personality, and Minted makes it easy to customize your wall mural to suit your vision. Select the perfect size for your wall, adjust colors to match your decor, and explore design elements that make the artwork truly yours. Whether you want a striking focal point or subtle wall decals as an artistic backdrop, you'll find a wall sticker that speaks to your style.
QUALITY YOU CAN SEE AND FEEL
Each Minted wall mural is printed on premium, matte-finish material that enhances the vibrancy of the artwork while eliminating glare. Our wall decals are made to last, ensuring your walls look stunning for years to come. And when you're ready for a change? Simply peel and reposition or remove without damage.
BRING YOUR WALLS TO LIFE TODAY
Ready to transform your space? Explore our collection of wall stickers and find the perfect design to express your style. With easy installation, unparalleled quality, and artist-created wall murals, Minted makes it simple to turn your walls into a work of art.
